posted on January 27, 2015 02:25
Audirvana Plus is a high‐end audiophile player for the Mac platform. It supports most popular audio formats, including FLAC, DSF, SACD ISO, Monkey Audio APE, AIFF, WAVE, WAVPACK, Cue Sheets and Apple Lossless. Audirvana can be used for two-channel and multichannel applications.
Follow this step-by step guide to configure Audirvana Plus for use with exaSound DACs.
1. Download and install the latest version of Audirvana Plus from the official developer’s website - Audirvana.com.
2. If you haven't done so, download and install the exaSound Mac driver from our customer service website - support.exaSound.com. You will find the step-by-step instructions in the Owner's Manual for your exaSound DAC.
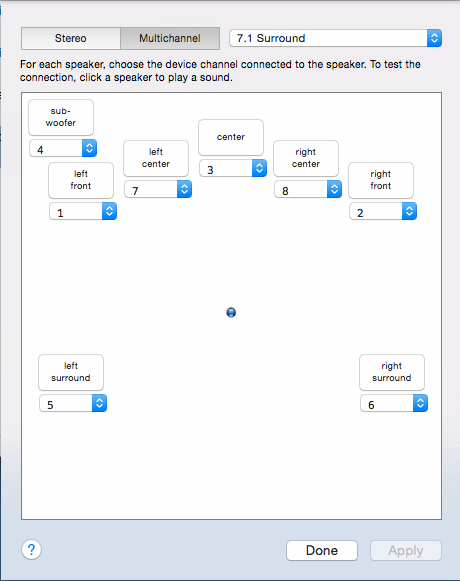
3. Start the Audio MIDI Setup application to verify the exaSound driver configuration. By default the driver is in stereo mode and the speakers configuration is also set to stereo.
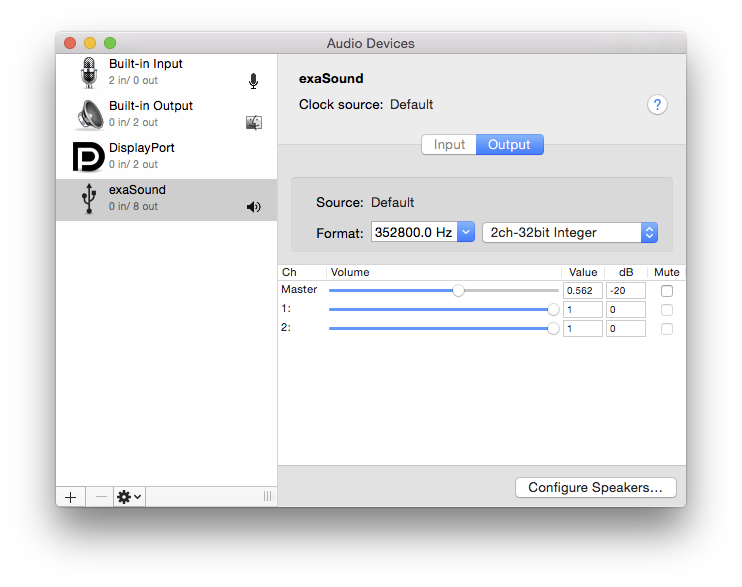
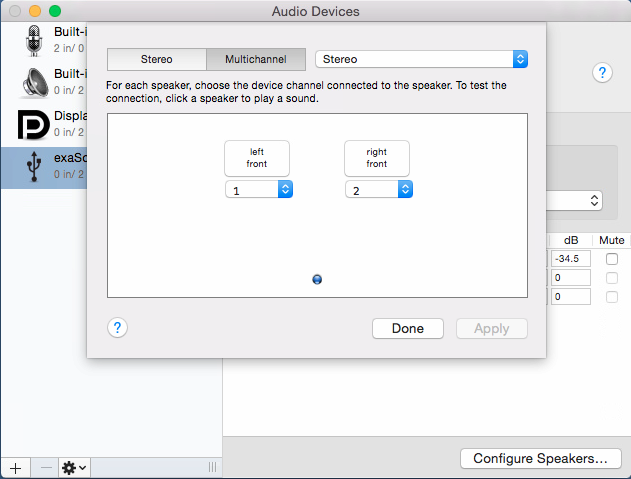
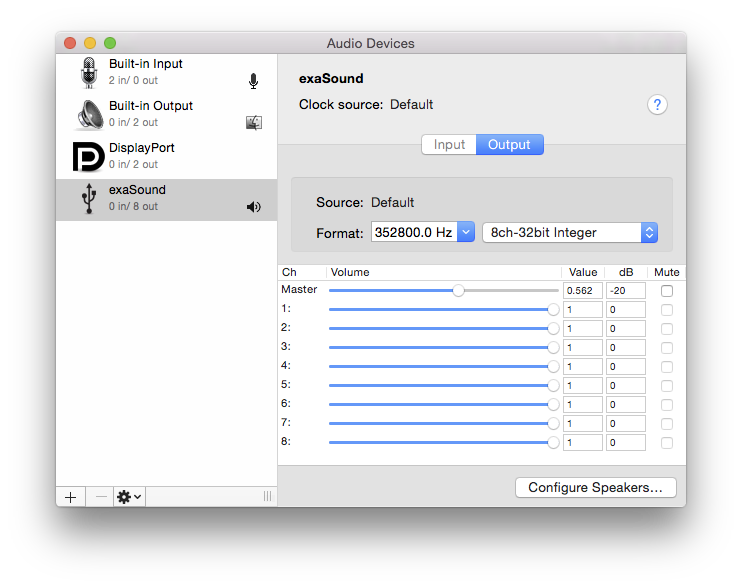
4. If you are using a multichannel exaSound DAC, select 8-channel mode and a speaker configuration that matches your setup,
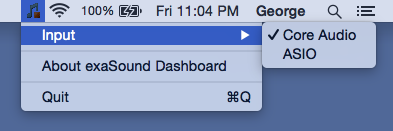
5. Make sure that the exaSound driver is set to Core Audio Mode.
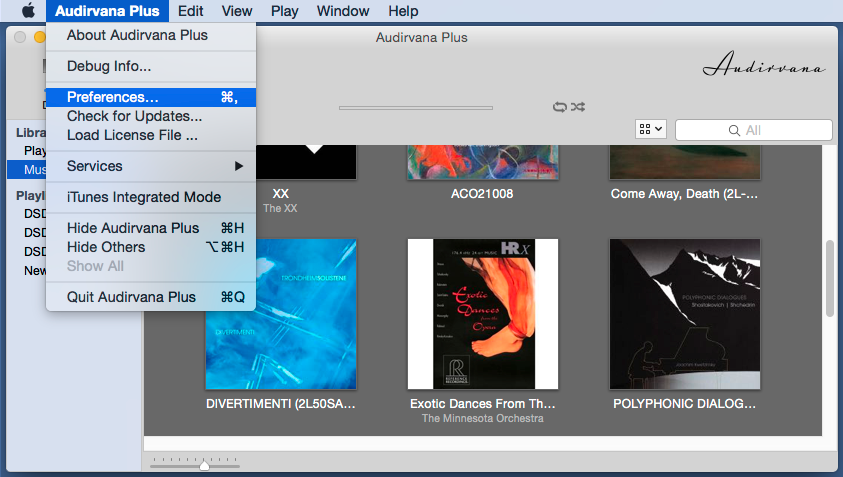
6. Launch Audirvana Plus. Open the Audirvana Preferences window.
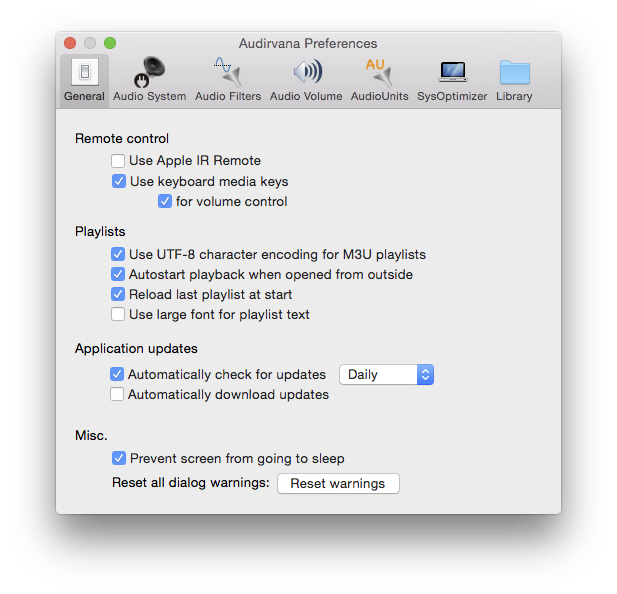
7. You will see the General tab. Uncheck Use Apple IR Remote. Make sure that Prevent screen from going to sleep is checked. The screen saver lowers the CPU performance and this can interfere with the the sound.
8. The Audio System Tab is the most important one. Work on it from the top to the bottom.
-
First you need to select the Preferred Audio Device. Select the exaSound driver.
-
Set Native DSD Capability to DSD Over PCM Standard 1.0
-
Make sure that Direct Mode is unchecked.
- You can use Exclusive Mode and Integer Mode.
- Note that the exaSound driver always works in Integer mode regardless of the state of the Integer Mode check-box.
- Exclusive Mode can be inconvenient for multichannel applications because it prevents the Audio MIDI Setup application from controlling the volume trimming for individual channels.
-
Usually there is no need to check Use Max I/O Buffer Size.
-
Start with the default value for Maximum memory allocated for tracks pre-load. You can experiment with this setting when everything else is set up.
-
It is important to set Spl rate switching latency to 0.5 or 1 sec. This option helps with clicks and pops between tracks with different sampling rates.
-
Set the other options on this screen as shown.

9. On the
Audio Volume tab select
DAC only.
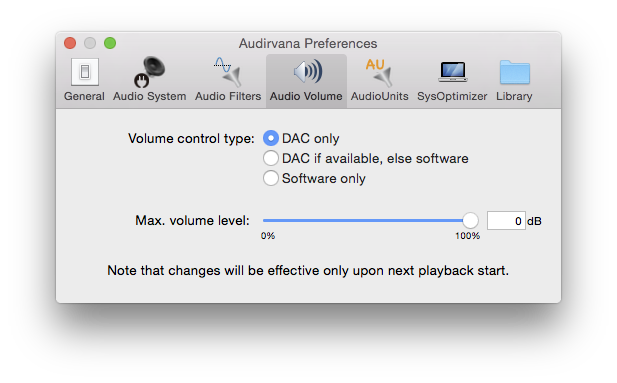
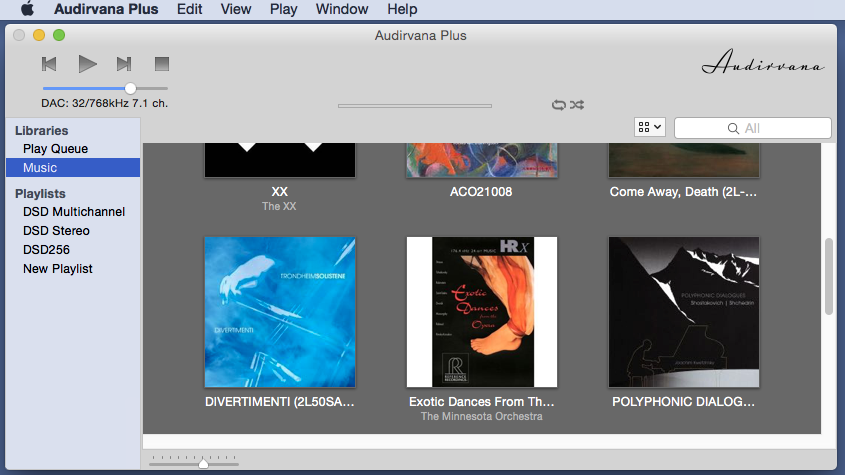
10. Close the Audirvana Preferences window. Move the Audirvana volume slider The volume display on the DAC front panel should change. This confirms that Audirvana controls the DAC built-in hardware volume control.
11. Play some music. Audirvana displays the current input configuration under the volume slider. The current file format is displayed to the left of the Audirvana logo.

