posted on January 07, 2015 01:44
JRiver Media Center is a "jukebox"- style media player that allows users to play and organize various types of media. It offers a world-class engine for audiophile playback. All data paths within the program are 64 bit. JRiver Media Center supports most lossless formats, including APE, FLAC, Windows Media Lossless, Apple Lossless, DFF and DSF.
Follow these instructions to install and configure J River Media Center for Windows for use with exaSound DACs:
The first step required for the Windows setup process is to download and install the exaSound ASIO drivers. If you haven't done so, please follow the driver installation instructions from the Owner's Manual for your exaSound DAC.
Download JRiver Media Center from the official company’s website http://www.jriver.com/download.html. Before you continue, make sure that JRiver Media Center is installed and you can play music using the default Windows sound card and the PC speakers.
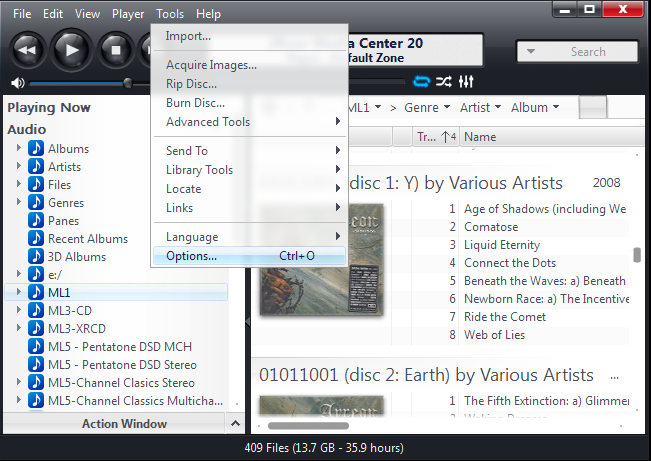
1. Start JRiver Media Center. Select
Tools -> Options from the application's menu.
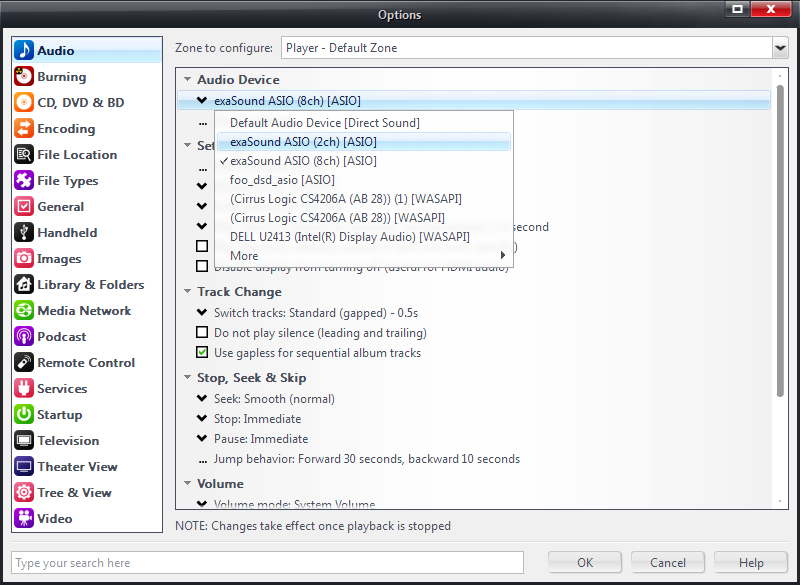
2. From the left pane of the Options window select Audio. Open the first drop-down in the right pane and select exaSound ASIO (2ch). If you are using a multichannel DAC select exaSound ASIO (8ch).
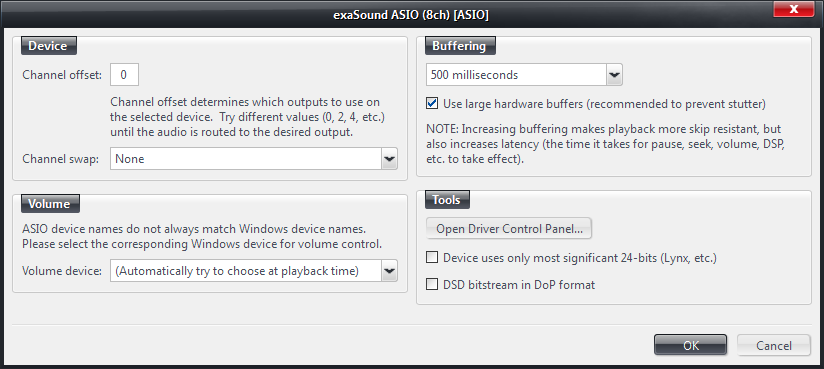
3. From the right pane of the
Options window select
Device Settings. For most applications
Channel offset should be 0 and
Channel swap should be
None. Set
Buffering to 500 milliseconds. Make sure that
DSD bitstream in DoP format is unchecked and click
OK.
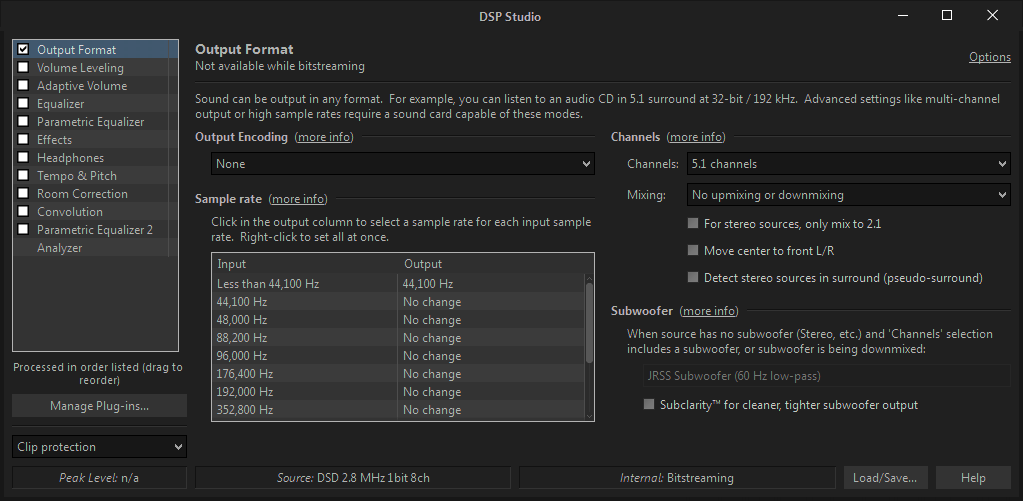
4. From the right pane of the Options window select DSP & Output Format. Check the Output Format check-box. In most cases you can accept the default settings. Make adjustments as necessary to setup JRiver for your speakers configuration.
For bitperfect playback you need to adjust the following settings:
- Set Output Encoding to None. This way PCM files will be streamed in PCM format and DSD files will be streamed in DSD format.
- In the Sample rate list set all frequencies from 44.1kHz to 384kHz to No change. This will ensure that all PCM files will be played in their native sample rate.
- In the Channels drop-down select the proper speaker configuration.
5. From the right pane of the
Options window open the
Bitstreaming drop-down and select
Custom.
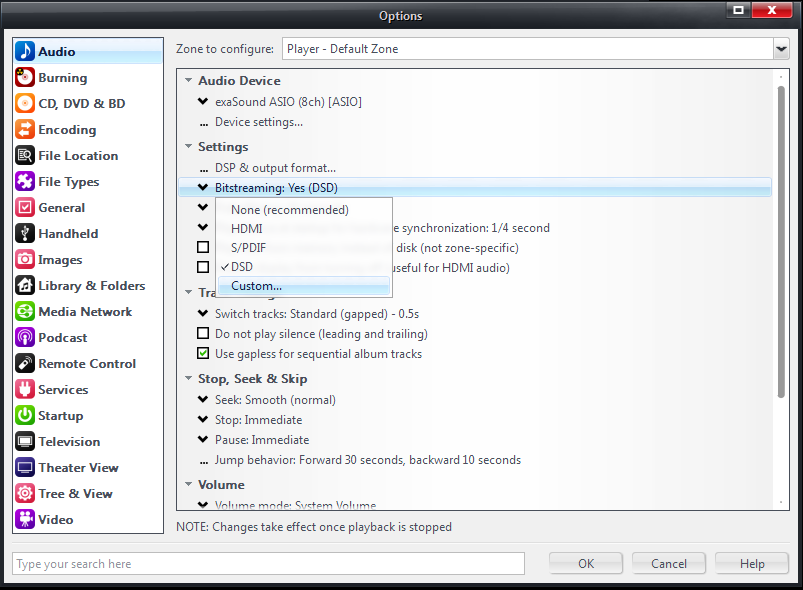
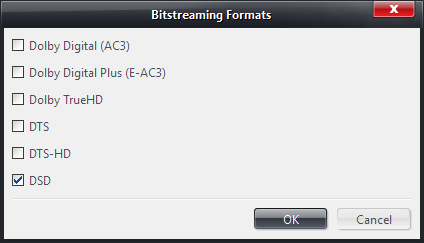
6. Select DSD.
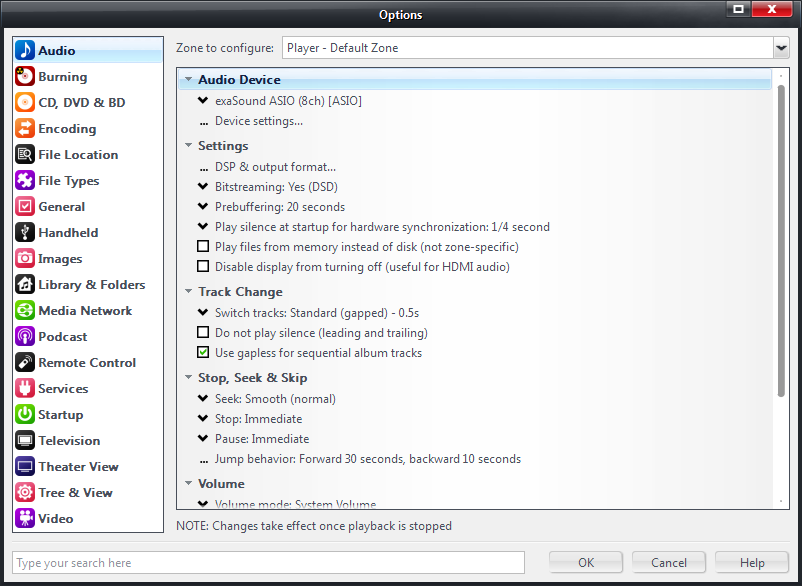
7. From the right pane of the Options window adjust the following settings:
- Prebuffering - 20 seconds
- Play silence at startup for hardware synchronization - 1/4sec
- Switch tracks: Standard (gapped) - 0.5S
- Use gapless for sequential album tracks
9. Scroll down the Options window and set Volume mode: System Volume.
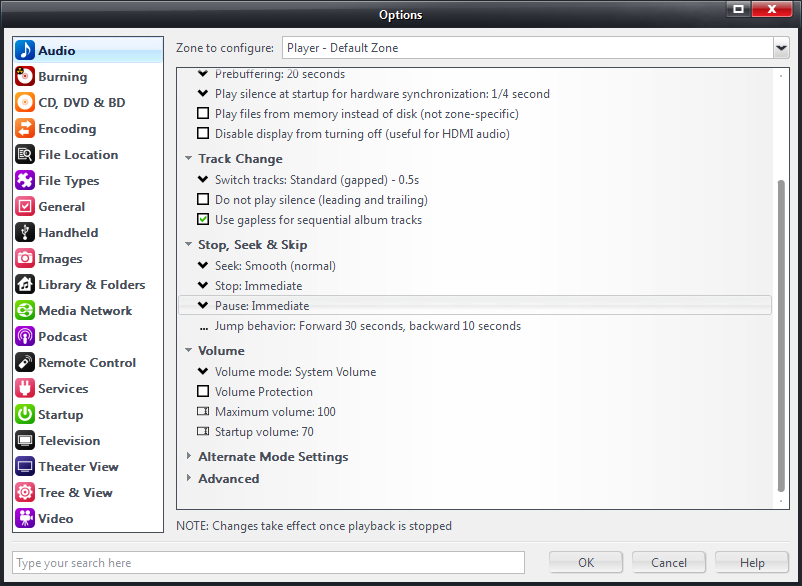
Click OK to close the Options window. At this point you should be able to play PCM and DSD files at all sampling rates and resolutions. The exaSound DAC's display should show the actual format and sampling rate of the source file.
Note that the DAC display always shows 8ch with the exaSound ASIO (8ch) driver and 2ch with the exaSound ASIO (2ch) driver.
Once you have JRiver configured for use with your exaSound DAC you can try the exaSound Volume Syncronizaton Plug-in. It allows JRiver and JRemote to access the hardware volume control built in all exaSound DACs.